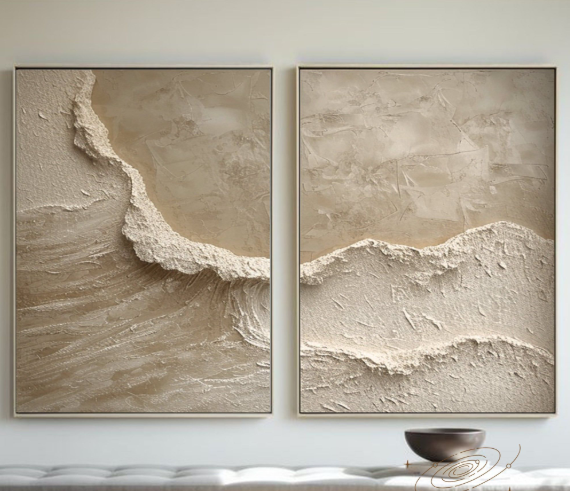
When Classical Oil Painting feels like taming history with a brush, the right tools turn chaos into beauty worth hanging—and buying.
Classical Oil Painting feels a bit like borrowing your grandmother’s cast‑iron pan—heavy with history, picky about care, and wildly rewarding when you get it right. Walk into an art store as a beginner and it hits fast: rows of paints, brushes with price tags that make you blink twice, and advice flying around like gossip at a family barbecue. Buy wrong, and your colors dull, crack, or fight back like a bad mood on Monday morning.
This guide cuts through that noise. No fluff, no ivory‑tower lectures. Just straight talk on which supplies actually matter, why quality saves money in the long run, and how the right setup turns frustration into that quiet, addictive joy painters chase. Stick around—the real story starts with what you put on your table before the brush ever hits the surface.
Screenshot 2026 04 16 110649 361
Why Choose Classical Oil Painting Supplies First?
Classical Oil Painting isn’t just about style; it’s about materials that hold up over time. When you break it down—Classical, Oil, Painting—each word points to tradition, chemistry, and craft. Choosing the right supplies early makes your oil painting smoother, brighter, and longer‑lasting. That’s why serious artists stick with proven tools for Classical Oil Painting.
Preserving Color Vibrancy Over Years
In Classical Oil Painting, color life starts at the core:
- Pigment quality
- Mineral and earth-based pigments
- High Lightfastness ratings
- Stable particle size
- Lab-tested modern pigments
- Reduced fading
- Cleaner tint strength
- Mineral and earth-based pigments
- Binder type
- Refined linseed and walnut oils
- Balanced oxidation
- Minimal yellowing
- Proper oil-to-pigment ratio
- Strong film formation
- Flexible surface
- Refined linseed and walnut oils
- Surface protection
- Careful Surface preparation
- Sealed ground
- Even absorbency
- Controlled use of Mediums
- Final Varnishing layer
- Careful Surface preparation
The 2025 Art Basel & UBS Art Market Report notes that collectors continue to favor works created with archival-grade materials, citing longevity and color stability as key value factors.
Brands like Nuvia Art focus on archival standards, so your Classical Oil Painting keeps its glow for decades, not just a few seasons.
Achieving Consistent Brushstroke Control
Good control in Classical Oil Painting feels almost addictive. It comes down to a few essentials:
- The right Brush shape for edges or blends
- Natural hog or sable Brush bristle type
- Balanced Brush stiffness for push and snap
- Adjust Paint viscosity with subtle Mediums.
- Test strokes before touching the canvas.
- Use Palette knife technique for thicker oil paint passages.
Short strokes. Smooth blends. Clean lines. That’s the rhythm of classical painting. With well-made tools from Nuvia Art, your Oil Painting process stays steady, and every mark in your Classical Oil Painting lands exactly where you want it.
Ensuring Proper Paint Adhesion
A solid Classical Oil Painting depends on layers bonding the right way:
- Foundation
- Proper Surface priming
- Even seal
- No raw fiber exposure
- Smooth Gesso application
- Thin coats
- Light sanding
- Proper Surface priming
- Support
- Suitable Canvas texture
- Fine weave for portraits
- Medium weave for general oil painting
- Strong Binder integrity in paint
- Suitable Canvas texture
- Layer control
- Respect Drying time
- Touch-dry check
- Oxidation wait
- Smart Layering technique
- Fat over lean
- Thin to thick
- Respect Drying time
Follow this flow and your Classical Oil Painting won’t crack or flake. Classical art deserves that kind of care.
5 Essential Oil Painting Supplies for Beginners
Classical Oil Painting breaks down into three simple ideas: Classical, rooted in tradition; Oil, the slow-drying binder; and Painting, the craft of layered color. Mastering Classical Oil Painting starts with smart tools, not fancy tricks.
Premium Linseed Oil Medium
In Classical Oil Painting, control over flow is everything. A refined linseed oil works as a reliable painting medium, strengthening the oil binder while adjusting viscosity, drying time, and final surface sheen.
- Improves glide during detailed oil painting
- Extends blending time in classical oil work
- Boosts color depth in traditional oil art
When choosing:
- Check clarity of the linseed oil (pale = refined).
- Test a drop for balanced viscosity.
- Monitor drying time on scrap canvas.
For beginners building Classical Oil Painting habits, a premium medium from Nuvia Art keeps layers flexible and stable, especially in multi-layer classical oil painting studies.
Durable Bristle and Synthetic Brushes
Brush control shapes every Classical Oil Painting stroke. The right mix of bristle brushes and synthetic brushes supports varied paint application.
- Brush shapes
- Round
- Flat
- Filbert
- Brush sizes
- Small (detail)
- Medium (blocking)
- Large (background)
Selection guide:
- Match bristle stiffness to paint thickness.
- Pair large flats with underpainting.
- Reserve soft synthetics for glazing.
- Practice steady brush care using mild solvent.
Good brushes survive heavy oil painting sessions and constant cleaning without losing edge—key for consistent Classical Oil Painting results.
Stretched Fine Linen Canvas
A solid linen canvas gives Classical Oil Painting its backbone. Compared to basic cotton, canvas weight and tight weaving improve durability.
Core features:
- Even canvas texture for smooth blending
- Properly primed canvas to protect fibers
- Firm stretched canvas tension
For classical oil painting beginners:
- Inspect corner folds.
- Press center for sagging.
- Confirm triple priming.
That steady painting surface keeps layered oil paint from cracking over time.
Professional-Grade Oil Pigments
Color defines Classical Oil Painting. High-end oil paints offer richer pigment quality, stable binder type, and smoother paint consistency.
| Paint Grade | Pigment Load (%) | Lightfastness Rating | Average Drying Time (Days) |
|---|---|---|---|
| Student | 20–35% | Fair (II–III) | 3–5 |
| Artist | 40–65% | Very Good (I–II) | 4–7 |
| Professional | 65–85% | Excellent (I) | 5–8 |
Higher color intensity improves mixing accuracy in classical oil painting. Strong lightfastness protects traditional oil painting work from fading. For serious Classical Oil Painting practice, pro pigments from Nuvia Art make blending cleaner and more predictable.
Safe, Low-Odor Solvent
A safe studio matters in Classical Oil Painting. A modern odorless solvent or turpentine substitute replaces harsh fumes.
Key uses:
- Thinning thick oil paints
- Cleaning brushes after heavy sessions
- Light diluting paint for underlayers
Basic routine:
- Wipe excess paint.
- Rinse in mineral spirits alternative.
- Wash with mild soap.
A quality paint thinner keeps classical oil tools fresh while protecting your space. Clean tools, steady materials, and patience—that’s how Classical Oil Painting grows from beginner practice into confident oil painting skill.
Standard vs. Professional Oil Paint Sets
Classical Oil Painting breaks down into three simple words: Classical, Oil, Painting. Put together, Classical Oil Painting stands for tradition, depth, and that slow-drying glow artists love. Your paint set shapes the outcome. For oil painting practice or serious classical work, the difference shows up fast on canvas.
Standard Oil Paint Sets
Standard sets are common in beginner Classical Oil Painting kits, especially for students testing the waters.
- Core Material Composition
- Pigment quality
- Lower concentration means softer color impact.
- Extra fillers reduce cost but weaken saturation.
- Binder type
- Often mixed oils that stretch volume.
- Can slightly affect drying time and film strength.
- Pigment quality
- Performance on Canvas
- Color selection
- Basic spectrum for learning color theory.
- Limited subtle earth tones used in classical art painting.
- Opacity and texture
- Some hues feel chalky.
- Layering for glazing in Classical Oil Painting may require extra coats.
- Color selection
- Longevity Factors
- Lightfastness
- Moderate resistance to fading.
- Suitable for studies, not always for gallery display.
- Lightfastness
For practice runs in oil painting, these sets get the job done. Just don’t expect museum-level glow.
Professional Oil Paint Sets
Professional sets are built for serious Classical Oil Painting, where control and permanence matter.
- Pigment Engineering
- High pigment load
- Dense color strength.
- Truer mixing results.
- Finely ground pigments
- Even dispersion.
- Cleaner blends in detailed passages.
- High pigment load
- Binding and Handling
- Superior binder
- Stable film after curing.
- Balanced drying time for layered techniques.
- Smooth consistency
- Effortless brush glide.
- Ideal for glazing and impasto.
- Superior binder
- Visual and Archival Quality
- Vibrant hues
- Rich shadows, luminous highlights.
- Excellent lightfastness
- Reliable for long-term display.
- Durability
- Strong paint film that resists cracking.
- Vibrant hues
In true Classical Oil Painting, materials matter. Professional sets simply give classical painting the depth and staying power it deserves.
Classical Oil Painting: Priming Techniques
Classical Oil Painting stands or falls on surface preparation. In Classical Oil Painting, the ground controls light, absorption, and durability. Serious oil painting practice starts long before pigment hits the brush. If you care about clean glazing and that timeless traditional oil painting glow, this matters.
Screenshot 2026 04 16 110624 378
Understanding Traditional Gesso Ground
In Classical Oil Painting, the gesso layer defines how paint behaves. True traditional gesso is not store-bought acrylic primer; it is a mineral and glue system designed for wood panel or prepared canvas.
- Core Components
- Binder System
- Heated rabbit skin glue
- Controlled dilution ratio
- Mineral Body
- Finely milled chalk
- Balanced absorption rate
- Surface Support
- Sealed panel (low flex)
- Properly stretched canvas
- Binder System
- Functional Behavior
- Light reflection increases luminosity in Classical Oil Painting.
- High absorption allows thin oil layers to grip firmly.
- Rigid primer prevents excessive oil penetration.
When preparing for oil painting at Nuvia Art, artists are trained to test absorbency by brushing water lightly across dried gesso.
- Fast soak = overly porous.
- Slow bead = sealed correctly.
Done right, the ground supports years of stable Classical Oil Painting practice.
Applying Chalk and Glue Primer
The classic gesso mixture blends chalk with warm rabbit skin glue. Timing matters.
- Warm glue gently; never boil.
- Sift chalk slowly to avoid clumps.
- Stir into a smooth gesso mixture.
- Apply thin layers using a wide brush.
Drying time affects adhesion and cracking risk:
| Layer Number | Drying Time (hrs) | Glue Ratio (%) | Surface Absorption (1–5) |
|---|---|---|---|
| 1 | 6 | 12 | 5 |
| 2 | 8 | 10 | 4 |
| 3 | 12 | 9 | 3 |
| 4 | 24 | 8 | 3 |
Quick reminders for Classical Oil Painting prep:
- Thin coats beat thick ones.
- Stable temperature reduces tension.
- Light sanding between layers improves mechanical adhesion.
Artists working in Classical Oil Painting often say the surface should feel firm but not glassy. At Nuvia Art, controlled humidity rooms help keep the primer stable, which seriously reduces cracking in later oil painting stages.
Sanding for a Smooth Painting Surface
A refined surface shapes brush control in Classical Oil Painting.
- Abrasive Selection
- Start with medium sandpaper (220 grit).
- Move to fine grit (400–600).
- Keep pressure light to protect texture.
- Process Flow
- Allow full drying.
- Sand in circular motion for evenness.
- Wipe dust before next coat.
- Surface Goals
- Uniform smooth surface
- Balanced tooth for glazing
- No exposed panel or raw canvas
Some artists prefer visible texture for expressive oil painting. Others chase a marble-like ground for detailed Classical Oil Painting portraits. Both approaches work, as long as sanding respects structure and preparation.
At Nuvia Art, students test each abrasive stage under side lighting. If shadows look consistent, the surface is ready. That’s the quiet backbone of lasting Classical Oil Painting.
FAQs about Classical Oil Painting
Why should beginners start with Classical Oil Painting supplies?
A steady hand grows faster with honest tools.
- Pure pigments stay true, resisting fade and yellowing.
- Traditional brushes answer pressure like living things.
- Stable layers reduce the heartbreak of cracks years later.
Many learners recall early failures like a system error—
“Warning: Undefined array key “candidates”…”—classical supplies quiet that chaos.
What separates professional oil pigments from standard sets?
Color tells the truth or it lies.
- Higher pigment load, fewer fillers.
- Mixing stays clean, skin tones breathe.
- Lightfast colors endure studio light and sun.
Cheap paint often behaves like
“Trying to access array offset on value of type null…”—it looks right, then collapses.
How does proper priming change Classical Oil Painting results?
A painting listens to its ground.
- Chalk-glue or traditional gesso grips paint gently.
- Light reflects back through thin layers.
- Cracking slows, detail sharpens.
Skip this step and the surface complains, much like
“Deprecated: str_replace(): Passing null…”
Which essential supplies matter most for a beginner?
Short answer: tools that forgive mistakes.
| Purpose | Choice | Human Effect |
|---|---|---|
| Blending | Refined linseed oil | Calm, open transitions |
| Control | Bristle + synthetic brushes | Confidence in the wrist |
| Support | Linen canvas | Quiet strength |
| Color | Professional pigments | Honest emotion |
Why does sanding between primer layers matter?
A smooth ground steadies the nerves.
- Brush glides, not drags.
- Glazes sit evenly.
- Small gestures feel deliberate.
Without sanding, paint fights back, echoing:

Screenshot 2026 04 16 110503 489
“Trying to access array offset on value of type null…”
How do artists preserve color vibrancy over time?
Care shows respect for future eyes.
- Stable pigments resist fading.
- Refined oils slow yellowing.
- Sound adhesion keeps layers loyal.
When materials fail, the warning signs arrive early—
“Warning… on line 89”—and the painter learns to listen.