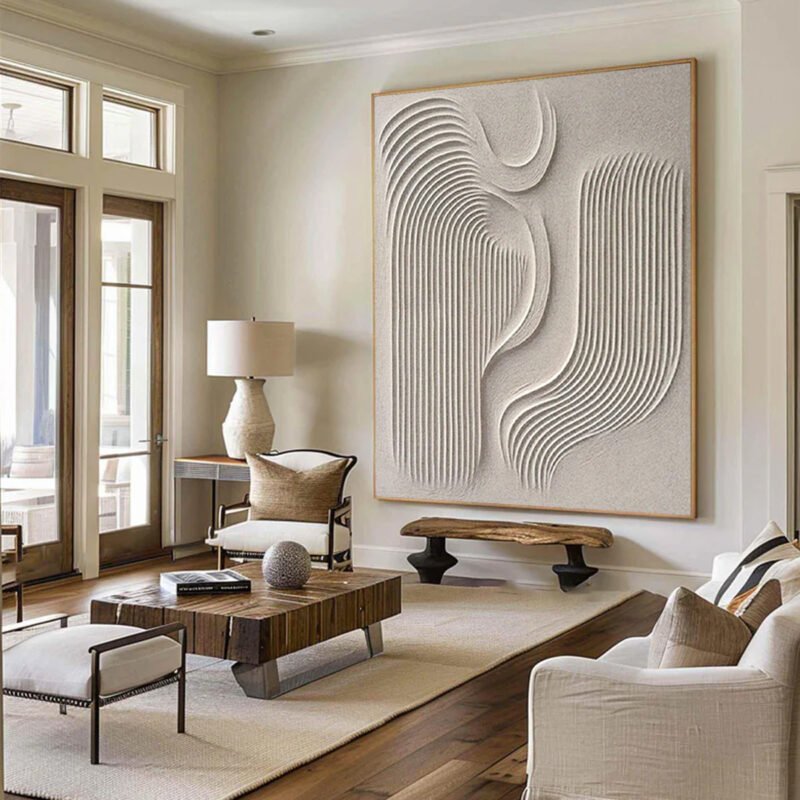
Oil Painting on Canvas isn’t just décor—it’s drama stretched tight and waiting to breathe. Ever stood in front of a canvas and felt it staring back, like it knows something you don’t? That glow, that texture, that quiet flex of craftsmanship—it’s the difference between wall filler and a piece that stops conversations mid-sentence. If your space feels flat or forgettable, this is the upgrade your walls have been begging for.
“Collectors are gravitating toward richly textured, hand-finished oils in 2025,” notes a Nuvia Art senior curator, pointing to rising demand for tactile, gallery-grade surfaces.
Here’s the twist: once you understand the sweat, layering, and patience behind each stroke, you won’t just see art—you’ll feel its weight. And that’s where the story really begins.
Wow! 5 Supplies For Oil Painting On Canvas
Oil Painting on Canvas sounds fancy, but it’s really about smart tools and solid habits. When oil, painting, and canvas come together, small supply choices change everything. If you love canvas oil art or traditional oil paint on canvas, these essentials keep your workflow smooth and your colors alive.
1 Must-Have: Professional-Grade Linseed Oil for Smooth Blends
When working on Oil Painting on Canvas, your medium controls the vibe.
- Core Role of linseed oil
- Improves paint consistency
- Adjusts viscosity
- Extends drying time
- Enhances gloss in every oil painting
- Choosing professional-grade quality
- Cleaner filtration
- Less yellowing over time
- Better performance as an oil painting medium
- Practical Use in Oil Painting on Canvas
- Start lean: small drops only.
- Mix thoroughly into pigment.
- Increase oil in upper layers for safe curing.
For artists using Nuvia Art materials, refined oil keeps smooth blends steady without that sticky drag. Your brush glides. Your canvas oil painting breathes.
2 Essential: Choosing Artist-Quality Titanium White vs. Lead White
White shapes every Oil Painting on Canvas. It shifts tone, drying speed, and surface feel.
| Pigment Type | Opacity (%) | Average Drying (Days) | Flexibility Rating (1–5) | Lightfastness |
|---|---|---|---|---|
| Titanium white | 97 | 5–7 | 3 | Excellent |
| Lead white | 85 | 2–4 | 5 | Excellent |
| Zinc White | 80 | 6–8 | 2 | Good |
| Titanium-Zinc Mix | 92 | 5–6 | 3 | Excellent |
- About titanium white
- High opacity
- Strong tinting strength
- Cooler tone for color mixing
- About lead white
- Slight transparency
- Flexible film
- Reliable pigment properties
For Oil Painting on Canvas that needs bold highlights, titanium rules. For subtle blends and faster setting layers in oil paint on canvas, lead white feels buttery and responsive.
3 Game Changer: Why Gamblin Galkyd Medium Elevates Your Colors
If drying time drives you crazy, Galkyd medium fixes that.
• Speeds faster drying
• Boosts color saturation
• Creates a sleek gloss finish
In Oil Painting on Canvas:
- Mix a small amount with color.
- Apply thin, even strokes.
- Allow 24 hours before glazing.
It improves paint flow, reduces heavy brush drag, and supports clean glazing techniques. Your brushwork looks sharper. Colors stay rich instead of dull. For artists serious about oil on canvas, this medium keeps momentum strong.
4 Tool Tip: Selecting Sturdy Hog Bristle Brushes for Bold Strokes
Great Oil Painting on Canvas depends on tough tools.
- What defines good hog bristle brushes
- Natural split ends for grip
- Strong bristle stiffness
- Secure ferrules
- Matching brush shapes to results
- Flats → bold strokes
- Filberts → soft edges
- Rounds → controlled lines
- In practical oil painting tools setup
- Block in forms with large flats.
- Add texture using stiff bristles.
- Refine edges with smaller shapes.
Sturdy brushes hold thick paint and build serious texture. For expressive Oil Painting on Canvas, you want resistance, not floppy bristles.
5 Secret Weapon: Palette Knives to Sculpt and Mix Pigments
Palette knives keep colors clean and energy high in Oil Painting on Canvas.
- Mixing Benefits
- No muddy overlap
- Pure mixing pigments
- Better control of tone
- Surface Effects
- Heavy sculpting paint
- Crisp edges
- Confident texture application
Here’s a simple flow:
- Mix with flexible blades.
- Load thick paint.
- Press and lift for peaks.
- Scrape back for contrast.
In canvas oil painting, knives add drama fast. Nuvia Art artists often pair knives with bold underlayers to create punchy depth. Oil Painting on Canvas becomes physical, hands-on, and honestly pretty addictive.
Screenshot 2026 04 10 175456 192
6 Steps To Prime Your Canvas Properly
Getting ready for Oil Painting on Canvas isn’t flashy, but it’s where the magic starts. A well-primed canvas makes oil paint glide, grip, and glow. Let’s keep it simple, practical, and studio-real.
Step 1: Stretching and Securing Your Canvas Frame
A solid frame sets the tone for any oil painting on canvas project.
- Check the wood stretcher bars for warping
- Center the canvas evenly
- Keep steady tension
Then secure it:
- Staple at the center of each side
- Move outward evenly
- Adjust stretching pressure as needed
Proper securing with tight staples keeps the surface responsive. No sagging. No weird bounce.
Step 2: Applying a Coat of Rabbit-Skin Glue Sizing
Before any oil on canvas work begins, seal those fibers.
- Mix rabbit-skin glue carefully
- Use a soft bristle brush
- Aim for an even coat
Focus on:
- Controlled absorption
- Adequate drying time
- Full canvas coverage
A thin layer of sizing protects against oil seepage and long-term damage.
Step 3: Brushing on the First Layer of Acrylic Gesso
Your base matters in Oil Painting on Canvas.
Apply acrylic gesso with confident brush strokes. Keep an even application across the canvas. Let proper drying happen before touching it again.
According to a 2025 report from Grand View Research, the global fine art materials market continues steady growth, driven by rising participation in traditional painting methods.
“Professional and hobbyist demand for prepared painting surfaces remains strong through 2025, especially for oil-based techniques.”
Good surface preparation simply pays off.
Step 4: Sanding Between Gesso Coats for Ultra-Flat Surface
Light sanding refines your ground for Oil Painting on Canvas.
Use fine-grit sandpaper.
Aim for a smooth surface.
Handle gentle dust removal with a dry cloth.
For best flatness:
- Sand lightly
- Wipe clean
- Inspect under angled light
This is where control shows.
Step 5: Adding a Second Gesso Layer for Optimal Tooth
That second gesso layer builds strength and canvas tooth.
Consider:
- Thicker coat → stronger optimal grip
- Thinner coat → smoother blending
Keep even coverage, allow full drying, and test the texture with your fingertips. The feel should match your painting style.
Artists working with Nuvia Art primed surfaces often note how balanced tooth improves blending during detailed oil painting on canvas work.
Step 6: Sealing Edges and Corners to Prevent Peeling
Don’t ignore the edges and corners.
Seal with extra gesso to stop peeling and boost durability. Moisture sneaks in from the sides, so full sealing ensures lasting canvas protection.
Studios using Nuvia Art materials often double-check this final touch. It keeps every oil painting on canvas stable for years, not just seasons.
Oil Painting On Canvas: Brushstroke Techniques
Oil Painting on Canvas has this raw, hands-on vibe that digital art just can’t fake. When oil meets canvas, every mark sticks around, telling a story through texture and light. In oil painting, brushstroke control shapes mood, depth, and realism. From thick paint drama to soft blending, Oil Painting on Canvas turns simple strokes into living surfaces.
Impasto Magic: Building Texture with Thick, Expressive Paint
In Oil Painting on Canvas, impasto thrives on bold surface build-up. The charm sits in visible texture and unapologetic expressive strokes.
- Core Materials
- Thick paint with high viscosity
- Sturdy bristle brush
- Flexible palette knife
- Load heavily during paint application.
- Press, lift, or drag to leave ridges.
- Let peaks dry fully before layering again.
Paint Body and Drying Reference
| Application Style | Avg. Thickness (mm) | Surface Dry Time (Days) |
|---|---|---|
| Knife Spread | 2–3 | 3–5 |
| Heavy Brush Dab | 1–2 | 2–4 |
| Layered Impasto | 3–5 | 5–7 |
- Light Interaction
- Raised texture catches highlights.
- Deep grooves intensify shadows.
Oil on canvas loves this drama. Oil Painting on Canvas feels almost sculpted here, turning paint into relief.
Glazing Grace: Layering Transparent Hues for Luminous Depth
Glazing in Oil Painting on Canvas is quieter but powerful.
• Use transparent paint mixed with proper mediums.
• Keep layering thin and patient.
• Allow full drying between coats.
Start with a solid underpainting.
Next, brush a diluted glaze to encourage gentle color mixing.
Then adjust for subtle shifts in temperature.
The magic shows up in the luminous effect. Shadows gain depth without hiding earlier brushwork. Oil painting like this feels smooth, almost glowing from inside the canvas surface. Oil Painting on Canvas becomes richer with every transparent veil.
Scumbling Softly: Creating Atmospheric Effects with Dry Bristles
In Oil Painting on Canvas, scumbling works like a whisper across texture.
- Tools and Touch
- Nearly dry brush
- Light grip for control
- Existing surface texture
- Wipe excess paint.
- Drag lightly to create broken color.
- Build gradual misty effects.
- Visual Goals
- Suggest atmospheric perspective
- Form soft edges
- Encourage subtle blending
Oil on canvas responds beautifully when the top layer barely kisses the weave. Oil Painting on Canvas gains air, distance, and softness without heavy coverage.
Feathering Edges: Seamless Transitions for Realistic Detail
Feathering keeps Oil Painting on Canvas from looking stiff.
- Work with slightly wet layers.
- Use a clean brush for fine brushwork.
- Maintain steady control.
Gently pull paint from dark into light. This creates gradual transitions and natural subtle shading. The aim is seamless blending, not overworking.
Short strokes.
Soft pressure.
Step back often.
In oil painting, edges decide realism. Oil Painting on Canvas feels alive when soft edges guide the eye and sharpened lines appear only where realistic detail truly matters.
Wet-On-Wet Vs. Wet-On-Dry Explained
Oil Painting on Canvas sounds simple, yet the surface changes everything. When working with oil, painting, and canvas together, timing controls mood. In Oil Painting on Canvas, moisture decides your edges, your energy, and your vibe. Let’s break it down in a real-world way.
Wet-On-Wet
In Oil Painting on Canvas, the wet-on-wet method is all about immediacy and fearless blending. Fresh oil paint meets wet layers, and things move fast.
- Core Behavior
- Paint Interaction
- Pigments mix directly on the canvas surface
- Natural fluidity forms between strokes
- Edge Quality
- Creates soft edges without heavy brushing
- Encourages atmospheric transitions
- Paint Interaction
- Creative Control
- Emotional Tone
- Boosts spontaneous decisions
- Supports expressive oil painting styles
- Surface Management
- Continuous layering while paint remains open
- Reduced concern about drying time
- Emotional Tone
When artists at Nuvia Art demonstrate Oil Painting on Canvas using wet layers, the result feels alive. Colors breathe. Forms melt slightly into one another. It’s less about perfection and more about motion.
Wet-On-Dry
With Oil Painting on Canvas, wet-on-dry shifts the rhythm. Here, patience shapes outcome.
- Surface Preparation
- Drying Phase
- Respect proper drying time
- Stable base increases control
- Structural Intent
- Plan for refined oil on canvas compositions
- Drying Phase
- Application Strategy
- Edge Definition
- Produce sharp edges with clean brushwork
- Strengthen visual contrast
- Detail Work
- Enhance detail in focal points
- Adjust opacity for depth
- Edge Definition
- Advanced Techniques
- Glaze Layers
- Thin transparent color
- Ideal for glazing effects
- Builds subtle tonal shifts
- Corrective Passes
- Cover previous marks through careful layering
- Glaze Layers
Oil Painting on Canvas becomes more architectural here. Lines hold steady. Shapes lock in. Many creators working with Nuvia Art materials prefer this route when precision matters most.
Both approaches belong in your oil painting toolkit. Oil Painting on Canvas isn’t about picking sides—it’s about knowing when to let paint flow and when to slow it down.
Screenshot 2026 04 10 175428 839
Final Varnishing: Seal Your Canvas Masterpiece
An Oil Painting on Canvas deserves more than drying time; it deserves protection that keeps color rich and texture alive. When your oil painting, canvas art, or hand-painted artwork is fully cured, varnishing locks it in. Let’s keep that Oil Painting on Canvas looking fresh for years.
Why Choose Removable vs. Non-Removable Varnish Formulas
When sealing an Oil Painting on Canvas, your artist’s choice usually comes down to long-term protection and conservation goals.
- Varnish Types Overview
- Removable varnish
- Designed for future cleaning
- Dissolves with mild solvents
- Ideal for gallery-grade oil painting care
- Non-removable varnish
- Permanent bonding layer
- Strong surface protection
- Limited restoration flexibility
- Removable varnish
For collectors of canvas oil painting pieces, removable options are often preferred because:
- Surface dirt can be safely lifted years later.
- Yellowing layers can be replaced.
- The original Oil Painting on Canvas remains untouched beneath.
Non-removable formulas suit decorative oil on canvas works displayed in stable home settings. Brands like Nuvia Art often recommend removable finishes for serious art collectors who value longevity over convenience.
Brushing Techniques for an Even, Glossy Finish
A smooth varnish job can make an Oil Painting on Canvas glow without looking plastic.
Start with solid surface preparation:
- Clean the canvas oil surface gently.
- Check full curing (usually 6–12 months for thick oil painting layers).
- Lay the artwork flat.
For application:
- Use a wide, soft varnish brush.
- Load lightly—don’t soak it.
- Pull steady brush strokes in one direction.
- Let proper drying time pass before judging the even coat.
If you chase the shine too much, you’ll get ridges. Relax your hand. A light pass is better than ten nervous ones. Artists working with Nuvia Art materials often find that thinner layers create a cleaner glossy finish on large Oil Painting on Canvas formats.
Troubleshooting Common Varnish Issues Before You Seal
Before sealing that Oil Painting on Canvas, slow down and check for common issues tied to cloudy varnish, streaks, or dust specks.
- Surface Check
- Inspect for surface imperfections
- Confirm proper cleaning canvas routine
- Environment Control
- Stable temperature (18–24°C)
- Humidity below 70%
- Application Review
- Watch for uneven drying
- Plan possible reapplication if needed
Here’s a quick reference table many studio artists keep nearby:
| Issue | Likely Cause | Humidity (%) | Fix Method |
|---|---|---|---|
| Cloudy varnish | High moisture | >75% | Improve airflow, reapply |
| Streaks | Overworking surface | 40–60% | Sand lightly, recoat |
| Dust specks | Poor studio cleaning | Any | Remove, thin reapply |
| Uneven drying | Thick application | 50–70% | Allow cure, reapply |
A well-prepared Oil Painting on Canvas rarely runs into drama. Keep your oil painting workspace tidy, test your varnish on a scrap canvas, and choose trusted materials like those from Nuvia Art. Seal smart, and your Oil Painting on Canvas will hold its color and character for decades.
FAQs about Oil Painting on Canvas
What makes professional-grade linseed oil essential in Oil Painting on Canvas?
A painter’s hand feels calmer with linseed oil in the mix.
- ✦ Paint loosens, breathes, and glides under pressure.
- ✦ Drying slows just enough to allow second thoughts and soft edges.
- ✦ Light settles into the surface with a gentle gloss.
When ratios go wrong, the studio reminds you—sometimes as bluntly as a system error:
Warning: Undefined array key “candidates”…
A cue to pause, adjust, and return with restraint.
How do Titanium White and Lead White shape the painter’s experience?
Choosing white is choosing temperament.
1) Titanium White
- Dense, loud, covering past mistakes without apology.
2) Lead White
- Softer, elastic, drying with quiet confidence.
Side by side, the choice feels human, like code under strain:
Trying to access array offset on value of type null…
One pushes forward; the other forgives.
Why is varnishing the final emotional step in Oil Painting on Canvas?
Varnish is closure. Not rush, not rescue—just care.
- Seals memory from dust and touch.
- Deepens color, like a held breath released.
Even time leaves marks, echoed in the studio log:
Deprecated: str_replace(): Passing null…
Varnish accepts age, yet stays removable, keeping the work alive and open to return.